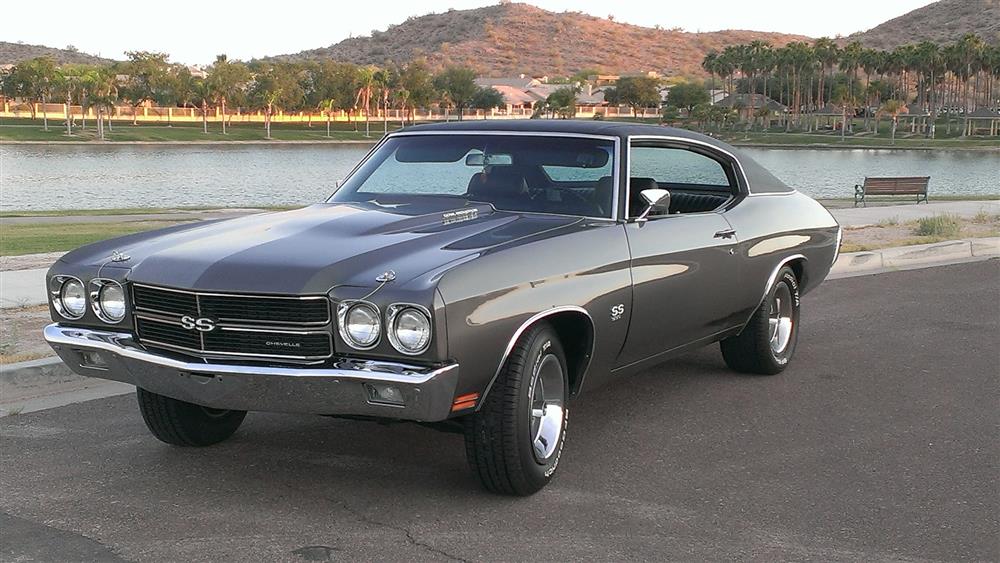
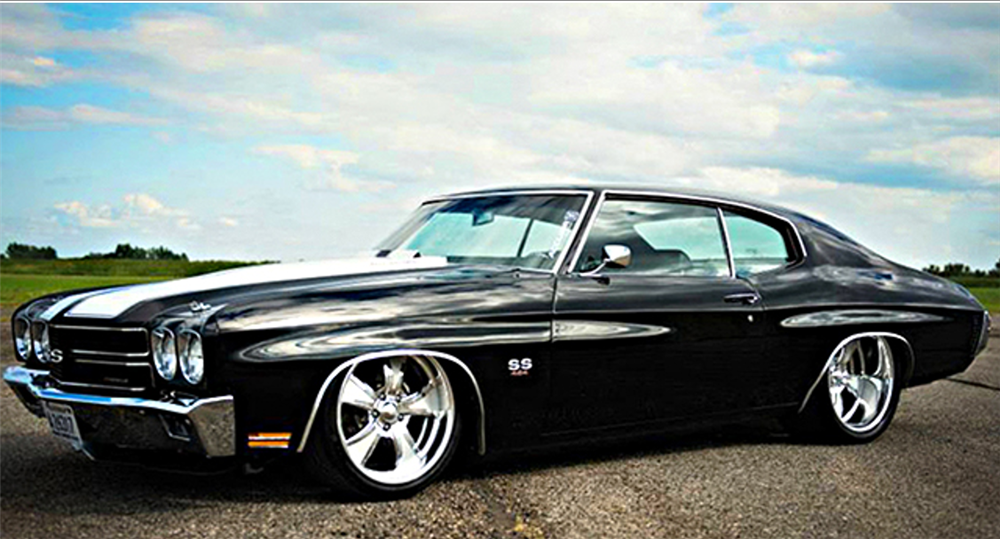
I purchased this car in 1976 from the original owner in North Royalton, Ohio. I drove it through my senior year in high school and with a heavy heart, I had to sell it in the fall of 1977 when I went away to school.
In January of 2012, I was contacted by a buyer who had found the car in a barn in Ashtabula, Ohio where it had been sitting since 1980, it was still black with gold stripes like I had painted it in 1977.
I purchased the car back and began a frame-off restoration with the help of my 14-year-old son. We have restored it to its former glory and back to the original color of Shadow Gray. The car is all original sheet metal except for the hood and front fenders. Their car was solid and needed no patchwork done.
This car is a true SS396, not a clone. The engine is a date correct ‘CE’ block, 3969854 casting 402 cubic inches. The transmission is a Turbo 400 that was built by “Transmission by Bruce” in Parma, Ohio who also built the original transmission. The rear end is the original 12 bolt positraction. The interior is the original dash, console and door panels. The car was a non-A/C car but since I moved to Arizona I wanted to have A/C, I purchased an original A/C unit out of a 72 Chevelle and modified the firewall by making a template. I then made a plate to cover the existing hole for the heater box and attached it to the firewall with panel adhesive.
We are always hearing about cool restoration and modified car projects from our customers, and would love to see and share that factory equipped A/C cars. We have added a form to our website so that you can describe and upload pictures of your ride so that we may share with our customers worldwide. So get your car cleaned up, grab a camera, and send us your best shots!
The RV2 air conditioning compressor is one of the biggest, heaviest cooling units that were mostly found on the early Chrysler/Dodge/Plymouth family of cars. What makes it cool is that the internals resemble a mini-version of a V-twin motor. Watch us tear down an RV2 compressor and give you an idea of how we go about restoring this classic workhorse.
First we wanna go ahead and start off and make sure the compressor does full rotation. Just to make sure that it is a core that is buildable. So, this here, this one's spinning all around so we know it's gonna be a good core for the most part. So we'll go ahead and just remove the clutch. So we'll go ahead and remove this bolt, be a half inch bolt on the face. Usually you can get a brass drift so you don't damage the shaft. Just give it a couple taps and the clutch will just come right off. Move the wires here in the back. And then we'll go ahead and we're gonna remove the manifold. Just tap the manifold off, the gasket holds it on pretty tight.
Underneath the manifold is the EPR valve along with a spring. So if you're gonna remain with an R12 compressor, it's gonna have an EPR valve, it's gonna use that. If you're gonna go 134A, we're actually gonna remove the EPR valve and we'll actually go into a thermostat system. That's gonna make the compressor turn off and on just like more of a modern day car. Alright, we're gonna go ahead and remove the EPR valve. From there we'll take the field coil off. Usually there's going to be contamination or it's gonna be some sort of low oil. They're very sensitive on the crank and there is no rings like you'd have on a car. So it's just the rods actually connect straight to the crank itself.
The oil pump in the rear, it's just a spring with a ball. As the gears cycle, it just actually pumps. So if those fail, typically what happen the ball itself will go out of round and prevent it from oil coming up. So we definitely want to check that. We'll go ahead and remove the brackets. Here we'll go ahead and remove the actually baseplate. This is where the oil pump actually sits and this is actually gonna show you the back of the inside of the compressor. Usually when a compressor does fail due to oil, this will be the pump here. You'll see the ball, it will actually go out of round. It's a rubber ball. If the ball goes out of round, then the oil can slide through it and it won't pick any oil up. You definitely want to make sure those are still round. If not, we will replace them. We use a ball bearing, so we go back to get rid of rubber and we go more of a steel bearing, a bearing ball. So what I end up doing is more and more getting things so everything else will fail. You wanna go ahead and just check everything, make sure everything's good inside. You should have play back and forward, nothing up and down. Go ahead and drain the oil real quick. Then we're gonna look for any contaminants inside the oil as well.
This compressor here is fairly nasty so definitely, definitely time for a good cleaning out. We'll go ahead and remove the valves. Let's see how those look. This is the valve plate here. These right here are the revalves that sit under the valve plate. You see here, this is what we want to look for. Underneath, I'm not sure if you can actually see it. I might have to remove it so we can see a little better. There is goes. So ya, a set of revalves here. And then underneath there's also another set. That's what determines all the suction and discharge.
So on this particular compressor, it is here. As the piston's coming up, it's pushing air out of the top, which is gonna channel into this tube here and out. That's where your refrigerant will come in at. And vice versa when a piston goes down, it's actually gonna suck the refrigerant in through here and out of this chamber using this revalve. We'll go ahead and remove the oil gear in the back. I'll need a 7/16's. Here's a portion of the oil pump where the gears are. And usually if the ball is out of round, then the gears also, they're gonna be damaged. So we'll have to replace the whole pump if that's the case. So you're gonna look for any kind of damage here, make sure everything is nice and smooth. And we'll go ahead and remove the pistons themselves. And then we wanna also check the actual cap. Look for any kind of wear on the cap. This one here is pretty clean. Then push down on the piston and should just pop right out. The piston's resting on the rod. You're gonna do the same thing. We're gonna check the cap. The bearing in general looks alright. These don't have bearings so it's just aluminum straight to the crank. So any kind of oil, any kind of oil loss, anything like that is gonna cause problems. Just tear into the aluminum. See there is still nice cross hatching on the cylinders.
This is a complete tear down of the RV2 Compressor. So if you guys have any questions, feel free to give us a call or go ahead and reach us at originalair.com.
Original Air UK customer, Richard Tracey, submitted his classic 1968 Ford Mustang GT 302 and like his sweet ride!
"After a long search from a friend in Georgia, I imported this highland green fastback in July 2014. Always wanted the 68 fastback, nothing comes as close as the fastback.
The chrome sets it off and the highland green is perfect colour. The car is all original. No new sheet metal to be had. The selectaire needs rebuilt, but I have time on my hands to do this. The original hoses got burnt from the engine heat, so replacing them was to keep the look of the engine bay correct.
This J Code is fully of optional extras, including FM Stereo radio that still works, centre console, deluxe interior, tinted glass, tachometer and GT. For the UK rules I had to put in original shoulder belts which I sourced from a friend in Virginia."
Ever have someone at a car show ask you your body type? If you weren’t in the know, you may have felt a little awkward. Don’t worry, as we are going to give you a quick primer on how to know your body types, starting with Dodge, Chrysler and Plymouth (also known as Mopar to those in the know).
A-Body
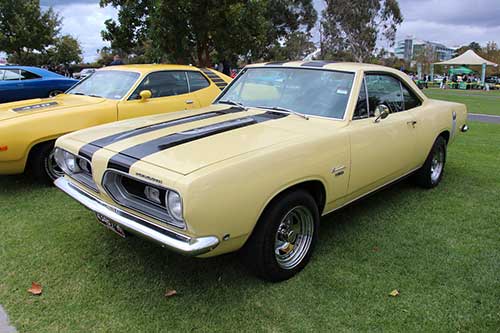
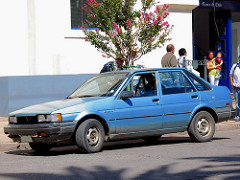
The A-body referred to compact cars with rear wheel drive running from 1960-1977. They consisted of models such as the Dodge Dart and the Plymouth Barracuda, Duster & Valiant.
B-Body
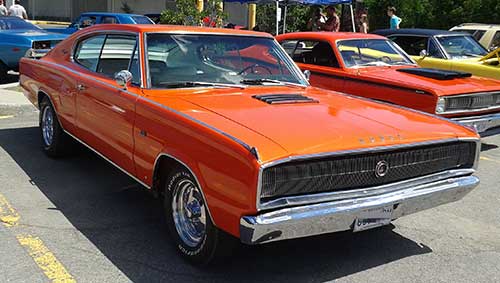
Applying the mid-size cars, the B-body was very popular and were typical of 1962-1979 years of production. Your muscle era cars such as the Dodge Charger, Plymouth Fury & Road Runner were built and marketed on the B-body. Although the styling differences varied between Dodge and Plymouth models, the cars were otherwise mechanically identical.
C-Body
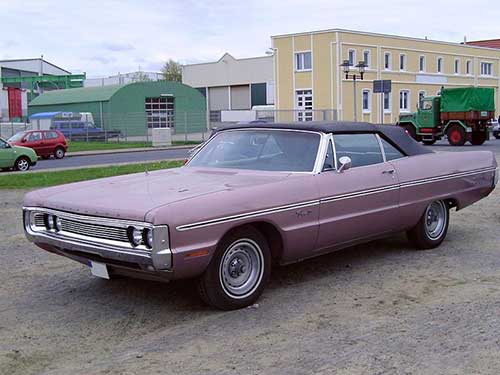
From 1965-1978, Chrysler’s C-Body platform was dedicated to full-size cars with rear wheel drive. Later year Plymouth Fury/Gran Fury and Chrysler and Dodge wagons represented the C-Body, with the C-Body Polara kicking off the series.
D-Body
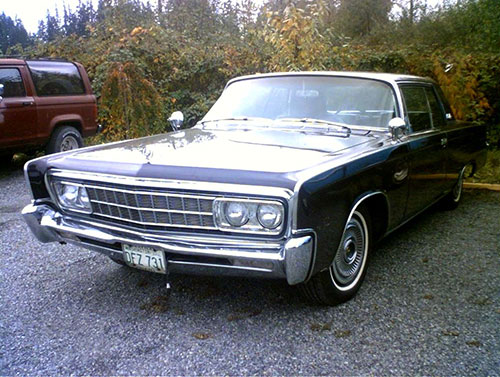
The first and second generation Imperial from 1957-1966 was know as the D-Body. It was Chrysler’s top of the line model and completely distinct with its own body class.
E-Body
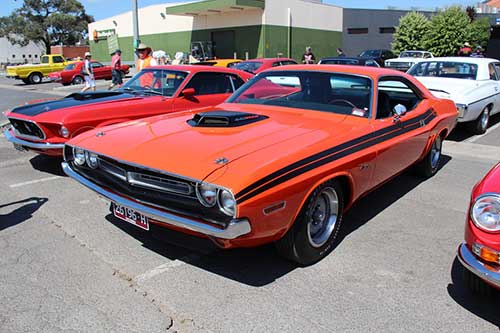
Although referenced in the 80s as the extended version of the Chrysler K platform, the E-Body to muscle enthusiasts refers to the 1970-74 Dodge Challenger and Plymouth Barracuda.
You might have seen this car countless times in movies, or your uncle had one in the ‘70s and 80s. But how well do you know all about the Nova? Test your knowledge with these quick facts about the popular classic muscle car.
There Are Five Generations Of Chevy Nova
Do you know that the Chevy Nova wasn’t just one model? It actually started in the ‘60s with the first-generation Chevy II Nova and was produced from 1962 - 1965. The first generation had the Chevy II Nova SS, a super sports car that launched in 1963, with Chevrolet introducing the V8 in 1965, which had better horsepower at 195hp with a weight of around 2,500 pounds. The second generation was simply aesthetic enhancements of the Chevy II Nova, which was available from 1966 – 1967. The third-generation Nova was the longest, 1968 – 1974, and had many modifications and enhancements. The fourth-generation from 1975 to 1979 was Chevrolet’s attempt to follow stricter safety regulations, but it didn’t sell well during this era. The last generation Chevy Nova was from 1985 – 1988.
The Chevy II Nova SS
The Chevy II Nova SS that came out barely a year after the first generation Chevy II Nova, is the only convertible model of the Chevy II Nova and was available for only a short time. This car was the top choice of muscle cars in its era and is still sought after today. Additionally, the 1967 Nova SS coupe was the only model with a console-mounted shifter, and the cars could either have a four-speed manual transmission or a Powerglide automatic transmission. It is historically relevant for being the only model with this transmission choice, as other models had column-mounted shifters.
Chevy Nova Not Selling Because of the Name?
What about the myth that Chevy Nova didn’t sell well in Spanish-speaking countries because of the name “Nova”, which somehow was interpreted as “it doesn’t go” or “no go”? Well, it simply isn't true. Car fanatics have debunked the old rumor and the myth is even mentioned on Snopes.com. It actually did sell well in Venezuela and Mexico, and overall did decent sales in Spanish-speaking countries generally because fluent Spanish speakers know the difference between “Nova”, and “no va”.
No Other Car Inspired The Design
The Chevy Nova was completely original, the name “Nova” which means “new” somewhat suggests that concept. During the years Chevrolet made the Chevy Nova, there was no other car that looked like it in design. The unique design was inspired by Chevy's losses to Ford in the competition for compact cars. Chevrolet decided to pursue an ingenious idea, and in 1961 they rolled out the first generation of the Chevy Nova, the 1962 Chevy II Nova. Additionally, it is historical for being one of the fastest developments of a new car in GM, taking only 18 months for the Chevy II Nova to be produced after the designers initiated the work.
Chevy Had A Terrible Version of the Nova
With the 80s bringing consumers smaller, more efficient cars, Chevrolet teamed up with Toyota to produce a front-wheel-drive compact car to badge as the Nova. It was produced from 1985-88 and was the ugliest model and total disrespect to the Nova name. We bet that there isn't even a version of it around today that someone would proudly drive.
Yenko Nova
Don Yenko, who was a muscle car expert, a car racer, and also belonging to Yenko Chevrolet, redesigned a series from Chevy Nova third generation. It is called Yenko SuperNova cars, which were a total of 37 cars. Twenty-eight of the supercars had Chevy 427cid V8 engines, although they were later changed to 350cid V8 engines in 1970.
The name “NOVA”
Chevrolet didn’t put the name “Nova” on the Chevy Nova cars until much later towards the end of the ‘60s. It was simply known as the Chevy II until the name “Nova” was used to describe the Chevy II's highest trim level.
Nova Clones
Lastly, Chevrolet's success with the Nova led to the creation of the X-Body clones Oldsmobile Omega, Pontiac Ventura, and Buick Apollo. Put all the models together and what do they spell?
Nova Omega Ventura Apollo
Got any other interesting Nova knowledge, please share with us!
This is a common question that comes up when looking to troubleshoot your AC system and understanding which kit makes sense to solve your problem. Tim took some time to explain the different kits and considerations when making your decision. Check out the video below and learn how a kit can make a difference in performance and reliability.
Hey everyone, today I'm here with Tim with Classic Auto Air's Original Air and we're talking about upgrade kits so Tim tell me a little bit about the different upgrade kits and what I would normally get, so for example a stage one kit? Our stage one kit comes with the compressor, compressor mount, both of the hoses that connect to the compressor and the filter dryer or equivalent grade. And a stage two kit? Stage two kit would get everything in the stage one kit, plus the condenser and liquid lines. All right, and then I'm guessing everything is in a Stage Three kit? Yes, you get everything that's in the stage two kit, plus the evaporator and valves.
So Tim, tell me a little bit about these compressor upgrade kits. Why is this a performance upgrade? The main reason is that it's going to draw significantly less horsepower, two to four horsepower as opposed to the 15 to 20 horsepower that the original compressors drew. Great, I always like performance so anything else about it? Well, you can run them up high, high rpms about 6,000 rpms while the air conditioning is running, it's gonna turn the air conditioning off while you're maxing out. Awesome, what about reliability? There's next to nothing that's more reliable. The original compressors were plagued by shaft seal leaks, causing all the other problems associated with it. This is very nearly a bulletproof ompressor. So these condenser upgrades, what are the benefits of the condenser that comes with this kit? Well, most cars came with a tube and fin style condenser. They were great or the original R12 type systems but almost nobody uses R12 anymore. So what the new car manufacturers do is they go with a parallel flow condenser like this. They're all coming with 134a and this will actually make up the difference. In these original cars that we're dealing with, the 25 to 40% of efficiency loss, this condenser alone will make up that difference.
Great, and do I need to modify or do anything for this? Nope, just bolt in and install it just like the original. So on stage three kits that includes everything, a little bit more of an investment but why should I consider investing at Stage Three? Well, there's a number of reasons. The first is that you're gonna basically solve the majority of the problems that you're running into. An old air conditioning system that we're dealing with compressor failure, this is gonna solve it. Potential valve problems, this is going to solve it. All of the normal things that are going to happen over the course of the years these cars are out on the road, this will solve. It'll also eliminate every trace of contamination, and contamination by far is the number one cause of any component failure in the air-conditioning system.
When you're saying contamination, that's like going from an R12 to a 134a? No, it means oil, traces of a passed failed compressor or anything. Because it's contaminations like fragments that are going circulating through this system that get in the compressor and cause your valve reads to get damaged your compressor would even lock up and then once that compressor locks up, it starts to spread things out throughout the system. The dryer or the equivalent is designed to just help filter out some of that, but it's not going to filter out all of it and then your oil degrades. So for example, if you bought a compressor upgrade, stage 1 kit, you still need to make sure that anything you're reusing, the evaporator, the liquid line, the condenser, anything else that's in the system is clean and free of contaminations or you'll be replacing a compressor once again. Same thing even a stage 2 kit, the evaporator can still have contamination. So you get all this you spend $800 or whatever the kit costs, and your kit your air conditioning doesn't work and we find out well that the evaporator wasn't flushed out properly and now you have a seized compressor because the contamination from that compressor goes straight from the evaporator, through this suction hose into the compressor. You have a failed or contaminated compressor that's not pumping or sucking properly and you're calling us and saying, "My AC compressor doesn't work right", and it's because you had contamination in the evaporator. Besides that is the time down, additional parts I'd have to buy, all these things that I just spent initially and got the upgrade kit, the stage 3, because I felt like my system had been upgraded anyway or I've chased a lot of issues, this could probably solve majority of my issues, especially if I'm going r12 to 134a? It'll solve all of your conversion issues and essentially this is a conversion from r12 to 134a because there's nothing else in the system that will be affected by that, but it will save you the time too that you're not gonna have you playing the part of the mechanic who thinks that you have a bad suction valve, changes the valve, the system gets recharged and still not working and then you find out no it's this valve or that the compressor wasn't functioning properly, whatever the case may be. In one fell swoop, you have basically everything that holds refrigerant in your system replaced solving a good 90% of the problems, if not all of them.
Well if you have classic car and it's got the factory a/c system and are looking for reliability and you are looking for dependability, maybe some performance gains, that it just kind of makes sense to consider looking at one of these upgrade kits.
Stolen. Not a word you would expect to say or think of at a charity car show, but thefts do happen at car events where many of us assume that others will respect our vehicle and property. Cameras, shift knobs, diecast models, rare literature, and manufacturer branded items are just some of the many things that get lifted from cars on display. It’s quite easy considering that almost all the cars are unlocked, windows are down and hoods are open as we share our pride and joy. To avoid the disappointment and anger that theft can bring, here are a few tips:
Don’t Bring It – If your show car also serves as a daily driver, or you use it for trips and errands, consider cleaning it out before going to a car event. Your significant other or kids may have left something of value in your ride that you may not want to lose.
Backpack – If you carry a nice DSLR or video camera, keep a backpack handy and carry it with you while at a show or event. It’s also handy for throwing in snacks and drinks and will make it easy if you decide to buy that part you happen to come across. If it’s not in the car, it can’t be stolen.
Lock It Up – If you are at a car show or car auction where you will not be within sight of your car for more than a few minutes, consider locking it up. This includes putting the windows up and closing the trunk and hood. Don’t take for granted that other car enthusiasts are as respectful as you.
Throw It In The Trunk – Most classic and muscle cars have a sizable trunk that locks. Use it! Just grab all your stuff and put it back there. An effective way to deter theft is to keep items out of sight.
Trunk Enclosure – A trunk enclosure allows for you to display your trunk openly, but has the capability of having all of your stuff hidden behind panels. Check out Alien Enclosures to see how they work and how cool it is to have a functional trunk without distracting from vehicle coolness.
Car shows are awesome and we love to share our enthusiasm and passion for cars with everyone. However, not everyone has the same level of respect for property and nothing can ruin an awesome day than to discover something has been removed from your vehicle without permission. Keep these tips in mind and may you never have to experience theft at a car show event.
At Original Air, we’ve heard plenty of stories of non-professionals troubleshooting AC issues for hours, only to find a simple mistake they had been making or overlooking. These cases always boil down to a simple piece of advice: if you are not a licensed AC professional, please do not evacuate/charge on your own. Going to a licensed professional is always worth it to ensure that the job is done right. Now that we have gotten that bit of advice out of the way, we've also seen many cases at Original Air of even the most experienced car people who don't understand evacuation. Even licensed AC professionals could use a quick summary, so this overview is for anyone who wants a review or a general understanding.
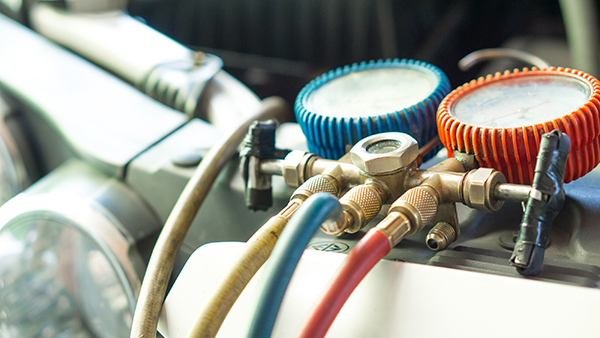
There are three main purposes of an AC system evacuation: to check for initial leaks, to remove air, and to remove moisture.
Initial leak check: When you evacuate an AC system, the low side should reach a minimum of 28-30" Hg within a short period, if everything is in order. If that's not the case, you know something is off.
Removing air: This purpose of evacuation is essential to your AC system because there is only so much available volume within the system. Removing the air leaves room for the refrigerant and oil. Air removal also eases the initial charge of refrigerant into the system.
Removing moisture: Finally, removing moisture is possibly the most important purpose of evacuation. This is because moisture is the leading cause of AC system failure. Moisture, when combined with refrigerant and lubrication, will turn acidic and will eat up your AC system from the inside out, which is as bad as it sounds.
We recommend 30-45 minutes of evacuation at 28-30" Hg of vacuum because moisture won't be drawn out by the vacuum pump unless it boils and the longer the evacuation, the more moisture will be removed. Running it for too long will result in reaching a diminishing point, but 30-45 minutes is the sweet spot, in our opinion.
In summary, evacuations should be 30-45 minutes at 28-30" Hg and you'll need a new filter drier. Let the AC system sit for 10 minutes. If the vacuum loss is less than 2" Hg, you’re ready to charge. After charging, you'll need to do an electronic leak test. But all that being said, don't do your own AC system evacuation if you're not a licensed professional. For any further questions or concerns, contact Original Air today!
When to replace the hoses in your car is generally aconcern forcar owners, as it affectsboth the efficiency of the car and the safety of its passengers. However, it can be complicated to know when it is the right time to replace your hoses. Of course, you do not want to replace a hose that is perfectly functioning because you want to save your money, but waiting too long can cause serious problems foryour vehicle.
Radiator hoses are exposed to high temperatures and are given the important responsibility of transporting coolant to the engine. It is pertinent, then, that the radiator hose is not damaged, since a damaged radiator hose puts the engine at risk of overheating.
So how do you know when to replace your radiator hose?
It is always better to replace the hose before it fails entirely. No one wants to be stranded on a highway somewhere because your car broke down. Preempt potentialproblems by being aware of when you should replace your hoses.
The most obvious indicator is if your coolant is leaking, then you need a new radiator hose.
Be cognizant of the current status of your radiator hose. If there are cracks, bubbles or bulges in the hose, it is time to replace it.
When the car has cooled down, touch the hose. If it has a crunchy quality, it is time for a new hose.
The estimated lifespan of common radiator hoses varies. Some say they last about five years while others say ten. Oftentimes, it depends on the car itself and how many miles it has been driven.
Knowing when to your radiator hose needs to be replaced is valuable insight and is beneficial to both you and your car. For more information about replacing radiator hoses or purchasing an engine compartment upgrade kit, consider contacting Original Air today.