Earlier this year, we helped Joe P with the A/C portion of his 1970 Nova small-block to big-block conversion. As many of you know, parts for these cars can be hard to come by, especially for a second-generation big-block Nova!
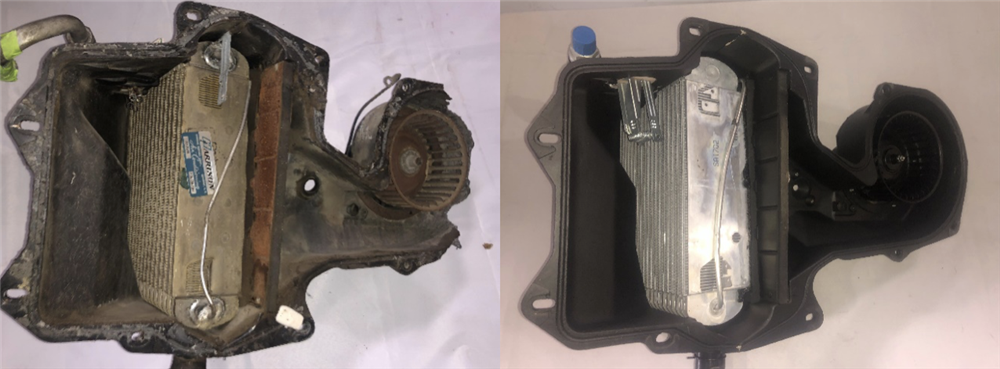
What many people don't realize is that with little to no modification, some first-generation F-body (1967-69 Camaro and Firebird) parts can be interchanged with little or no modifications whatsoever (more details on this coming soon!). Joe P did and was able to get his hands on a 1969 Firebird evaporator unit, which he sent to us for restoration.
Upon receipt, we were able to see right away that it had suffered a fair amount of damage in transit. Since we do this kind of repair regularly, and the unit was already going to require some fiberglass modification to convert it for his 1970 Nova, this wasn't a problem.
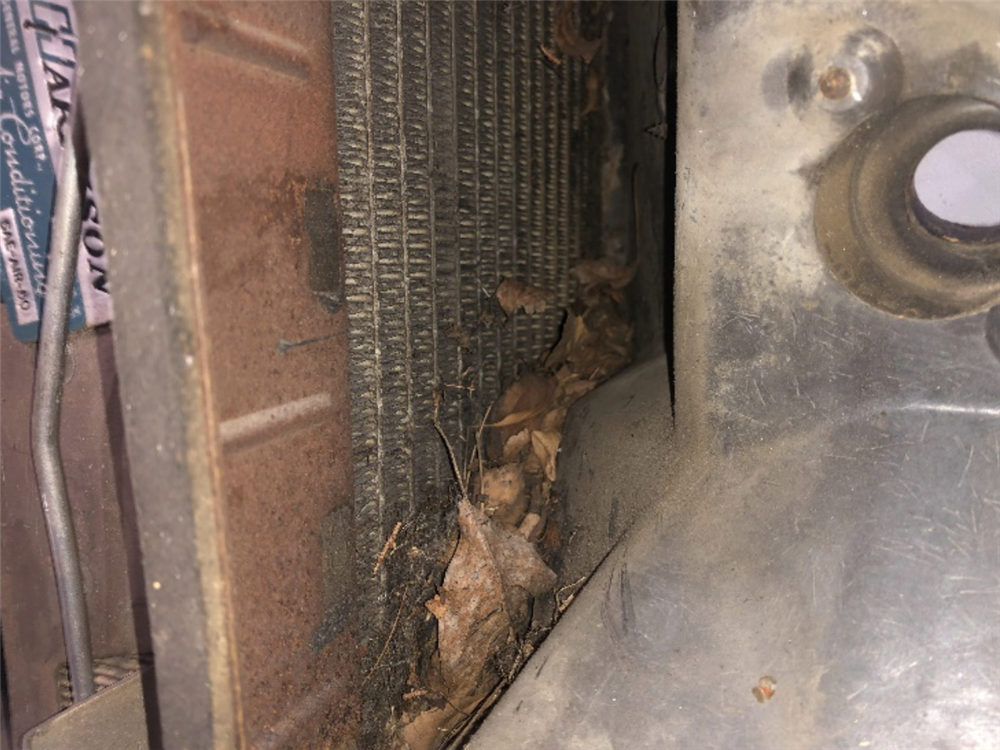
As you can see below, this unit has leaves and other debris on the inlet side of the evaporator. This kind of external contamination is a very common source of reduced air volume and system efficiency for evaporators of all makes and models. It essentially renders the blocked portion of the evaporator useless.
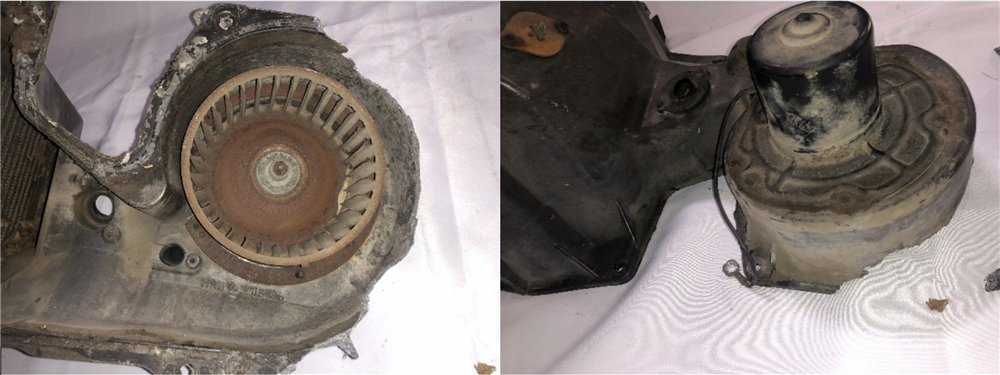
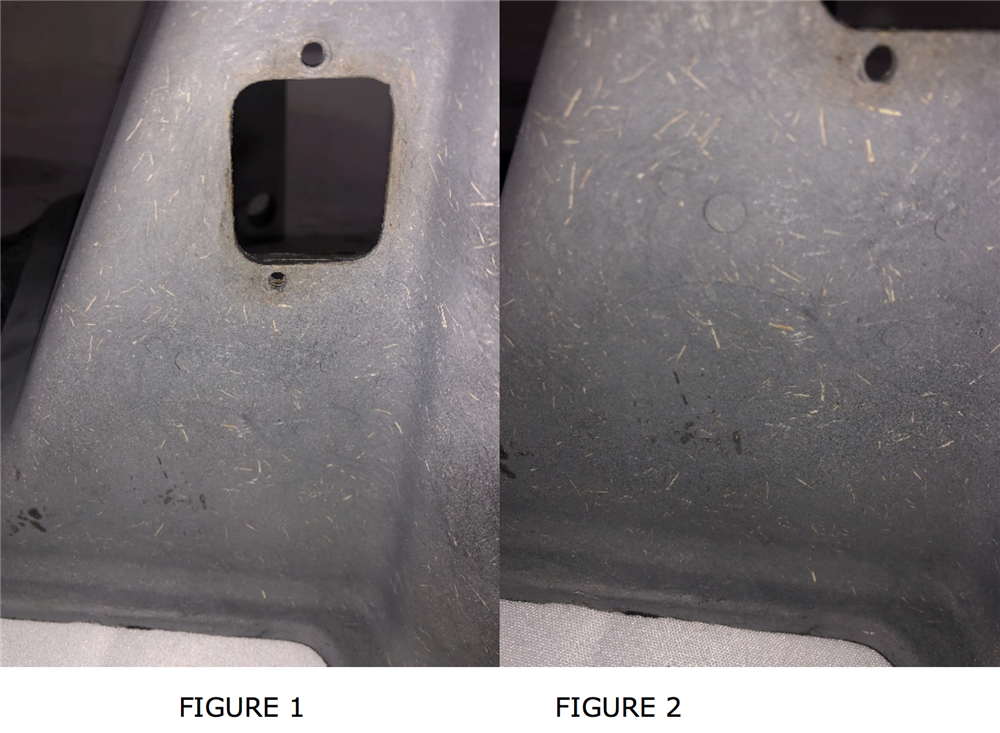
Since all Pontiac engines are nearly the same external size as big-block Chevy engines, 1967-69 Firebirds all use the same housing as 1967-69 Camaros with a big-block engine. There is one key difference between the 1969 Firebird unit sent to us and the 1969 Nova that was to be installed: a different resistor mounted in a different location of the inboard (engine side) case half.
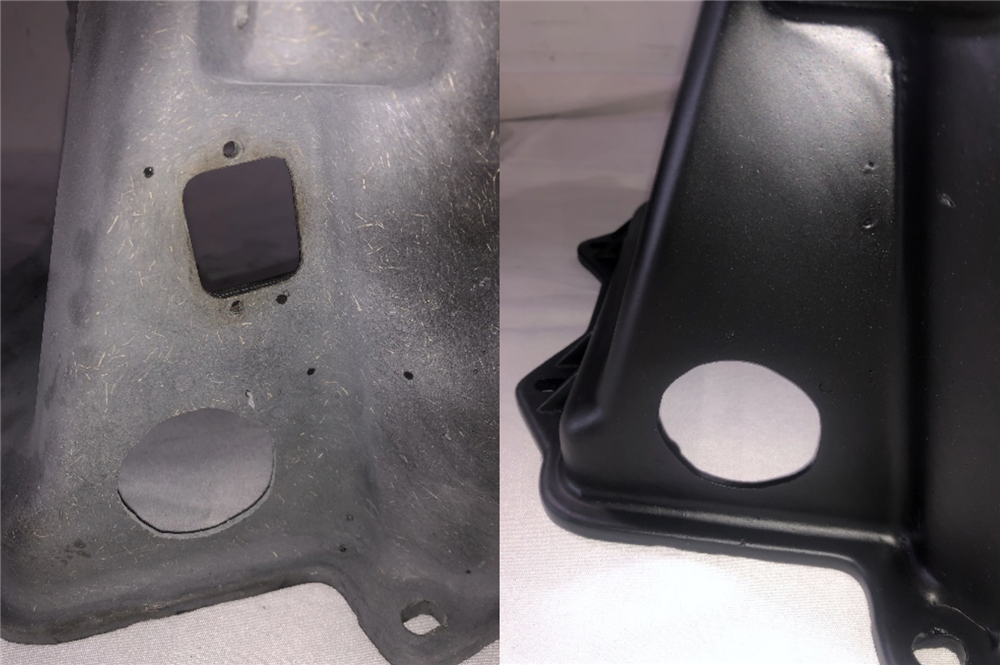
In this case, we had to close the rectangular opening used by the 1969 Firebird blower resistor (see figure 1) and open a circular one for the 1970 Nova blower resistor. Fortunately, there is a mold impression we can use (see figure 2) to cut our new resistor opening.
Next, we refilled the rectangular opening and refinished it. Due to the fiberglass repairs and modifications, Joe opted to paint the unit black to give it a cleaner look.
Additionally, we had to repair the shipping damage to the outboard (fender side) case half.

Based on Joe's needs, here's a breakdown of what went into this unit:
- Fiberglass repairs and modifications to the evaporator case housing including painting the housing black and zinc plating, and painting and detailing the various brackets and clamps.
- Rebuild, calibration to 134a refrigerant, and installation of the POA valve.
- Recondition, testing, and installation of the expansion valve including new cork/refrigerant tape to insulate the sensing bulb on the evaporator.
- Recondition and installation of the original ambient sensor switch.
- Installation of a new evaporator.
- Installation of a new blower motor.
- Installation of a new drain tube.
- Installation of a new 1970 Nova blower resistor.
- Installation of a new heater core tube seal.
If you have questions about what Original Air can do for your car, give us a call, send us an email, or leave a comment below!